VW T2 Bay clock - Installation Instructions:
- This item requires you to have the metal backing/blanking plate ("Time clock delete plate") on which to install the clock. Most buses have this, if they didn't come with the factory clock.
- This is a fully reversible installation which will not in any way harm or damage any original aspect of your T2.
Your AA battery operated clock is intended to be a reproduction of the original 12v clock offered as an optional extra on the VW T2 campervan buses.
There are two options for installation of your clock as follows:-
I suggest you start with Option 1 to see if you are happy with the positioning of the clock and to help decide whether you would prefer to set the clock further back in the binnacle to align it more closely with the positioning of the other gauges (in which case follow the additional steps in Option 2).
Option 1
This option is the simplest installation and requires no dismantling, unscrewing or drilling of anything. The clock simply fits snugly into the spare binnacle to the right of the speedometer.
- Start by checking that the clock fits snugly into your VW T2 dashboard space. Some T2 dashboards have the flat glass installed but most do not. The glass will need to be removed if you want the clock to sit down into the dashboard bezel. The glass is h eld in with a metal ring at the rear that needs turning slightly anti-clockwise and the glass will come out easily.
- Remove the rubber band from the outside of the clock case . This is not required but is supplied just in case you prefer to use it, but please be aware that this would make the clock difficult to remove to replace the battery etc.
- Gently attach the sucker to the clock glass. This will aid the positioning and alignment of the clock in the binnacle. The case of the clock should fit snugly into the space without the need for excessive force but it might need to be gently wriggled into place and the sucker should help you achieve this. It will be a snug fit so please BE GENTLE!
When the battery needs changing simply use the sucker to gently remove the clock and replace. The plastic backplate should remain attached to the backing plate by the sticky pad to ensure that when the clock is replaced it remains in exactly the same orientation as before.
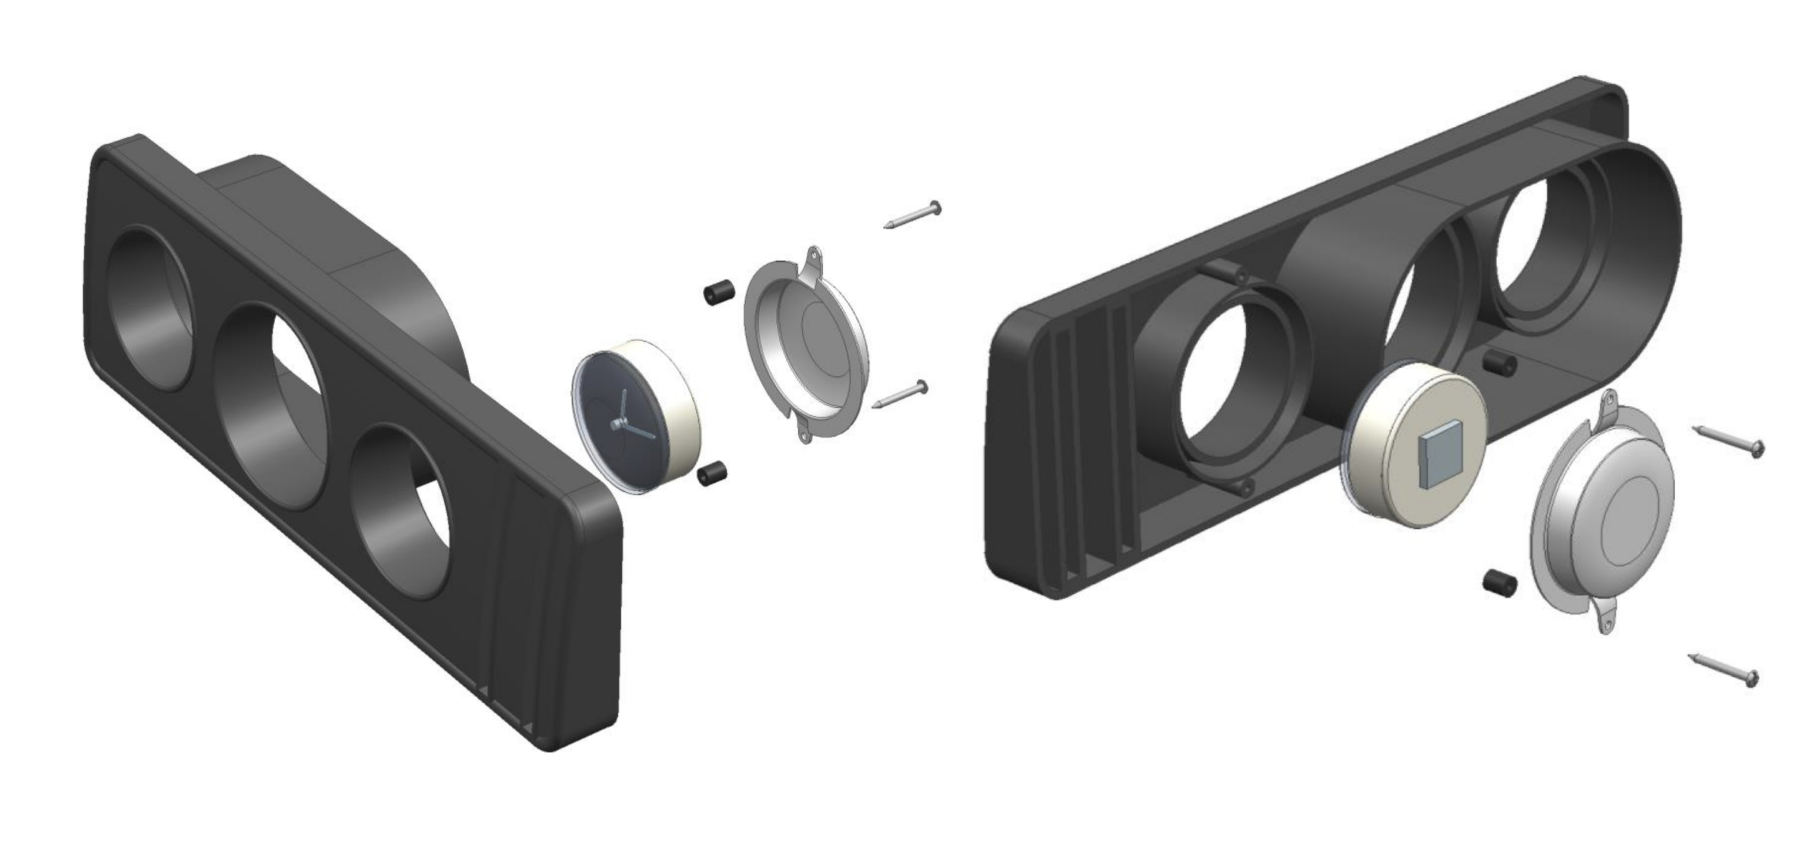
Option 2
This option allows you to recess the clock face back in the binnacle by the correct amount to align the clock face with the speedometer and other gauges. This is a more involved process but still very easy.
- The rear blanking plate is held in by 2 small screws at the top and bottom. These can be accessed by reaching under the dashboard and using a screwdriver or small spanner. If you prefer, you can remove the instrument panel for better access.
- Place the 2 x nylon spacers between the blanking plate and the rear of the dashboard and re attach the blanking plate using the 2 longer screws provided. DO NOT OVER TIGHTEN, as the plastic is fragile and could split.
The clock can now be installed as in Option 1 above and will be further back in the binnacle with the clock face more in - line with the other instruments.
Shop Our range of VW T2 Dashboard Clocks Here
Or
Read the Air-Style Magazine Review